Read the latest moving news & tips, latest moving technologies, business news on moving companies, stories, and moving in general.

How to Move House Without Losing Your Mind?

How to move house without losing your mind?  Moving to a new house is an exciting milestone, but the process of packing up your belongings, coordinating logistics, and adjusting to a new environment can be overwhelming. Follow these expert tips from Cheap Movers Costa Mesa to keep your sanity intact during the moving process:

How to Move House Without Losing Your Mind?

  1. Start Early and Plan Ahead: Avoid last-minute stress by starting the moving process as early as possible. Create a detailed moving timeline that outlines tasks such as decluttering, packing, hiring movers, and notifying utilities. Planning ahead will give you ample time to tackle each task methodically and reduce the likelihood of feeling overwhelmed.
  2. Declutter and Organize: Before packing, take the opportunity to declutter your belongings and streamline your possessions. Donate or sell items you no longer need or use to lighten your load and simplify the moving process. Organize your belongings into categories and pack them systematically to make unpacking easier at your new home.
  3. Stay Organized with Lists and Labels: Keep track of your belongings and maintain organization throughout the moving process by creating lists and labeling boxes. Use color-coded labels or a numbering system to indicate which room each box belongs to, making it easier to unpack and locate items in your new home.
  4. Enlist Professional Help: Hiring professional movers can alleviate much of the stress associated with moving. Research reputable moving companies like Cheap Movers Costa Mesa and request quotes well in advance. A reliable moving company can handle the heavy lifting, transportation, and logistics, allowing you to focus on other aspects of the move.
  5. Take Breaks and Practice Self-Care: Moving can be physically and emotionally exhausting, so it’s essential to prioritize self-care throughout the process. Take regular breaks, stay hydrated, and get plenty of rest to avoid burnout. Treat yourself to small rewards or activities you enjoy to maintain a positive mindset during the transition.
  6. Stay Flexible and Embrace Imperfection: Despite meticulous planning, unexpected challenges may arise during the moving process. Stay flexible and adapt to changes as they occur, rather than striving for perfection. Remember that minor setbacks are normal and focus on the bigger picture of settling into your new home and community.

Conclusion:

Moving house doesn’t have to be a stressful ordeal. By following these tips from Cheap Movers Costa Mesa, you can navigate the moving process with greater ease and maintain your sanity along the way. With careful planning, organization, and self-care, you’ll be well-prepared to embark on this exciting new chapter in your life.

GET A FREE QUOTE

How to Move Into a Building With No Elevator?
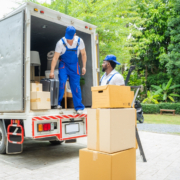
How to move into a building with no elevator? Moving into a building with no elevator can be a daunting task, but with the right preparation and strategy, it can be manageable and even relatively stress-free. Here are some helpful tips to make your move as smooth as possible:

How to Move Into a Building With No Elevator?

  1. Assess Your Belongings: Before the move, take stock of your belongings and determine what items you truly need to bring with you. Consider selling, donating, or storing items that you can live without, especially if they are bulky or difficult to transport.
  2. Plan Ahead: Plan your moving day meticulously, taking into account the layout of the building, the number of stairs involved, and any potential obstacles along the way. Schedule your move during off-peak hours to avoid congestion and minimize disruption to your neighbors.
  3. Hire Professional Movers: Consider hiring professional movers who have experience navigating stairs and moving heavy items. Cheap Movers Costa Mesa specializes in efficient and affordable moving services, including moves into buildings with no elevator. Our trained professionals can handle the logistics of your move with ease, ensuring that your belongings arrive safely and on time.
  4. Use Proper Equipment: Invest in or rent proper moving equipment such as dollies, hand trucks, and moving straps to help transport heavy items up and down stairs. These tools can significantly reduce the physical strain of moving and make the process more efficient.
  5. Pack Strategically: Pack your belongings in sturdy boxes and containers, making sure to distribute weight evenly to prevent injuries during transport. Label each box with its contents and destination room to streamline the unpacking process once you arrive at your new home.
  6. Enlist Help: If possible, enlist the help of friends or family members to assist with the move. Having extra hands can make the process faster and more efficient, especially when navigating stairs and tight spaces.
  7. Communicate with Your Building Management: Inform your building management or landlord about your move-in date and inquire about any rules or regulations regarding moving into the building. They may be able to provide helpful tips or assistance to make the process smoother.
  8. Take Breaks: Moving can be physically demanding, especially when dealing with stairs. Be sure to take regular breaks to rest and hydrate throughout the day to avoid fatigue and injury.
  9. Stay Organized: Keep track of important documents, keys, and moving supplies throughout the process to ensure that everything arrives safely at your new home. Keep a checklist of tasks to complete and mark them off as you go to stay organized and on track.
  10. Celebrate Your Success: Once the move is complete, take a moment to celebrate your accomplishment and enjoy your new home. Treat yourself to a meal or a relaxing evening in your new space to unwind after a successful move.

Conclusion:

Moving into a building with no elevator may seem daunting, but with careful planning and the right resources, it can be a manageable and even rewarding experience. By following these tips from Cheap Movers Costa Mesa, you can ensure a smooth transition into your new home without the added stress.

GET A FREE QUOTE

Moving to The Country: YES or NO to a Life in The Country

Moving to The Country: Are you considering a move to the countryside but feeling torn between the allure of rural living and the comforts of city life? Making the decision to move to the country is a significant step that requires thoughtful deliberation. With its scenic landscapes, slower pace of life, and closer connection to nature, rural living offers a distinct lifestyle that appeals to many.

However, it also comes with its own set of challenges, including limited access to amenities, potential isolation, and adjustments to a different way of life. To help you navigate this decision, Cheap Movers Costa Mesa explores the factors to consider when contemplating a move to the country:

Moving to The Country

  1. Lifestyle Preferences: Consider your lifestyle preferences and priorities. Are you seeking peace and tranquility away from the hustle and bustle of city life? Do you enjoy outdoor activities such as hiking, gardening, or farming? Moving to the country offers opportunities for a simpler, more relaxed lifestyle close to nature.
  2. Access to Amenities: Evaluate the availability of amenities and services in rural areas compared to urban centers. While the countryside offers scenic beauty and a sense of serenity, it may lack easy access to conveniences such as shopping centers, healthcare facilities, and entertainment options. Consider whether you are comfortable with the trade-offs involved.
  3. Employment Opportunities: Assess the job market and employment opportunities in the area you are considering moving to. While remote work has become more prevalent, certain industries may have limited job prospects in rural areas. Determine whether your career goals align with the opportunities available in the countryside.
  4. Community and Social Connections: Explore the sense of community and social connections in rural areas. Living in the countryside often fosters strong bonds within tight-knit communities, where neighbors support each other and come together for shared events and activities. Consider whether you are drawn to this sense of belonging and community spirit.
  5. Educational and Recreational Facilities: Consider the quality of educational institutions and recreational facilities available in rural areas, especially if you have children or enjoy pursuing hobbies and interests. Research schools, libraries, parks, and other amenities to ensure they meet your family’s needs and preferences.
  6. Cost of Living: Compare the cost of living in rural areas versus urban centers. While housing may be more affordable in the countryside, other expenses such as transportation, utilities, and internet access may vary. Evaluate your budget and financial goals to determine whether rural living aligns with your financial circumstances.
  7. Environmental Considerations: Reflect on your environmental values and the impact of your lifestyle choices on the natural surroundings. Moving to the country offers opportunities to live more sustainably, with access to fresh air, clean water, and outdoor recreational activities. Consider whether you are committed to preserving and protecting the environment.

Conclusion:

Deciding whether to move to the country requires careful consideration of various factors, including lifestyle preferences, access to amenities, employment opportunities, community connections, educational facilities, cost of living, and environmental considerations. By weighing the pros and cons with the guidance of Cheap Movers Costa Mesa, you can make an informed decision that aligns with your values, goals, and aspirations for a fulfilling life in the countryside.

GET A FREE QUOTE

How to Pack Earrings for Moving?

How to pack earrings for moving? When preparing for a move, delicate items like earrings require special attention to ensure they arrive at your new home intact. In this detailed guide, Cheap Movers Costa Mesa shares expert tips on how to pack earrings for moving securely, safeguarding your precious jewelry during the relocation process.

How to Pack Earrings for Moving?

  1. Gather Supplies: Before you start packing, gather the necessary supplies, including small jewelry boxes, jewelry pouches, bubble wrap, packing paper, and small zip-top bags. These materials will help protect your earrings from damage during transit.
  2. Sort and Organize: Begin by sorting your earrings and organizing them into pairs. This will make it easier to pack and unpack them at your new home. Consider separating earrings by type, such as studs, hoops, or dangle earrings, to prevent tangling.
  3. Use Jewelry Boxes: Place each pair of earrings in a separate compartment of a jewelry box or organizer. If you don’t have individual jewelry boxes, use small containers or pill organizers to keep earrings separated and organized.
  4. Wrap Earrings Individually: For extra protection, wrap each pair of earrings individually in packing paper or tissue paper. This will help prevent them from scratching or tangling during transit. For delicate or dangling earrings, wrap them in bubble wrap for added cushioning.
  5. Secure with Zip-Top Bags: Place wrapped earrings in small zip-top bags to keep them secure and prevent them from getting lost. Label the bags with the contents or use a marker to indicate which earrings are inside each bag for easy identification later.
  6. Pack in a Small Box: Once your earrings are individually wrapped and secured, place them in a small box or container. Fill any empty spaces with additional packing material, such as packing peanuts or shredded paper, to prevent movement during transit.
  7. Label and Seal: Seal the box with packing tape and label it clearly as “Fragile” and “Earrings” to alert movers to handle it with care. You may also want to indicate which room the earrings belong to in your new home for easy unpacking.
  8. Transport with Care: When loading boxes onto the moving truck, place the box containing your earrings in a secure location where it won’t get crushed or jostled. Consider transporting it yourself in your car for added peace of mind.

Conclusion:

By following these expert tips from Cheap Movers Costa Mesa, you can pack your earrings for moving with confidence, knowing they’ll arrive safely at your new home. Trust Cheap Movers Costa Mesa for all your moving needs, and enjoy a stress-free relocation experience.

GET A FREE QUOTE

How to Pack Cables For Moving?

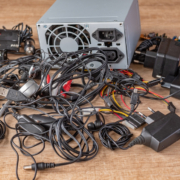
How to Pack Cables For Moving? Packing cables for a move may seem like a daunting task, but with the right approach, you can ensure that your cables remain organized and protected during transit. In this article, Cheap Movers Costa Mesa shares valuable tips and techniques to help you pack cables efficiently and prevent any damage or tangles along the way.

How to Pack Cables For Moving?

  1. Gather Your Supplies: Before you start packing, gather the necessary supplies, including cable ties, twist ties, ziplock bags, cable organizers, and packing materials such as bubble wrap or packing paper. Having these items on hand will make the packing process much smoother.
  2. Sort and Label Cables: Begin by sorting through your cables and identifying which ones you’ll need for your new location. Separate cables by type (e.g., HDMI, USB, power cords) and label them accordingly. This will make it easier to unpack and set up your electronics at your new home or office.
  3. Bundle Cables Together: Use cable ties, twist ties, or ziplock bags to bundle cables of similar types together. Avoid creating overly large bundles, as this can lead to tangling and make it difficult to untangle them later. Keep bundles manageable in size to ensure easier handling.
  4. Use Cable Organizers: Invest in cable organizers or cord organizers to keep your cables neatly organized and prevent them from getting tangled during transit. These organizers come in various shapes and sizes, allowing you to customize them to fit your specific needs.
  5. Protect Fragile Cables: For fragile cables or those with delicate connectors, such as HDMI or audio cables, use bubble wrap or packing paper to provide added protection. Wrap the cables carefully to cushion them against impact and prevent any damage during the move.
  6. Pack Cables Securely: When packing cables in boxes or containers, ensure they are packed securely to prevent shifting during transit. Use packing materials such as packing peanuts or crumpled paper to fill any empty spaces and provide additional cushioning.
  7. Label Boxes Clearly: Finally, label your boxes containing cables clearly with their contents and destination room. This will make it easier to locate specific cables when unpacking and setting up your electronics in your new space.

Conclusion:

Packing cables for a move doesn’t have to be complicated. With these tips from Cheap Movers Costa Mesa, you can pack your cables efficiently and ensure they arrive at your new location safe and organized. By taking the time to sort, bundle, protect, and label your cables properly, you can streamline the moving process and avoid any headaches associated with tangled cords.

For reliable and affordable moving services in Costa Mesa, contact Cheap Movers Costa Mesa today.

GET A FREE QUOTE


How to Pack Light Bulbs for Moving?

How to Pack Light Bulbs for Moving? When preparing for a move, it’s essential to take special care when packing fragile items such as light bulbs. Light bulbs are delicate and can easily break during transit if not properly packed. Cheap Movers Costa Mesa understands the importance of protecting your belongings during a move. In this article, we’ll provide you with effective tips for safely packing light bulbs to ensure they arrive at your new home intact.

How to Pack Light Bulbs for Moving?

  1. Gather Your Supplies: Before you begin packing, gather the necessary supplies for safely packing light bulbs. You’ll need sturdy cardboard boxes, packing paper or bubble wrap, packing tape, and a marker for labeling.
  2. Remove Bulbs from Fixtures: Start by removing the light bulbs from their fixtures carefully. Turn off the power to the fixtures and allow the bulbs to cool completely before handling them. Gently twist the bulbs counterclockwise to remove them from the sockets.
  3. Wrap Each Bulb Individually: Once the bulbs are removed, wrap each one individually with packing paper or bubble wrap. Start by placing the bulb in the center of the paper or wrap and fold the sides over it. Secure the wrapping with packing tape to ensure it stays in place.
  4. Provide Cushioning in the Box: Before placing the wrapped bulbs in the box, provide cushioning at the bottom with crumpled packing paper or bubble wrap. This will help absorb any shocks or impacts during transit and protect the bulbs from damage.
  5. Arrange Bulbs in the Box: Carefully arrange the wrapped bulbs in the box, ensuring that they are snugly packed together to prevent shifting during transit. Fill any empty spaces with additional packing paper or bubble wrap to provide extra cushioning and support.
  6. Label the Box: Once the box is packed, label it clearly as “Fragile” and “Light Bulbs” using a marker. This will alert your movers to handle the box with extra care and ensure it’s placed in a safe position during transportation.
  7. Seal the Box Securely: Finally, seal the box securely with packing tape to prevent it from accidentally opening during transit. Reinforce the seams and edges of the box with additional tape for added security.
  8. Load the Box Carefully: When loading the box into the moving truck, place it in a secure position where it won’t be crushed or damaged by heavier items. Avoid stacking heavy boxes on top of the box containing light bulbs to prevent crushing or breakage.

Conclusion:

With these simple yet effective tips, you can safely pack light bulbs for moving and ensure they arrive at your new home intact. Cheap Movers Costa Mesa is committed to providing you with expert moving solutions, including the safe packing of fragile items like light bulbs. By following these guidelines, you can enjoy a smooth and stress-free move knowing that your belongings are well-protected throughout the journey.

GET A FREE QUOTE

How to Pack Mugs for Moving?

How to pack mugs for moving? Packing fragile items like mugs for a move requires careful attention to ensure they arrive at your new home intact. Cheap Movers Costa Mesa understands the importance of safeguarding your belongings during transit. In this comprehensive guide, we’ll share expert tips on how to properly pack mugs for moving, helping you minimize the risk of breakage and damage along the way.

  1. Gather Packing Materials: Before you begin packing your mugs, gather the necessary packing materials. You’ll need sturdy cardboard boxes, packing paper, bubble wrap, packing peanuts, and tape. Make sure the boxes are clean and sturdy enough to support the weight of the mugs.
  2. Wrap Each Mug Individually: Start by wrapping each mug individually to provide cushioning and protection. Place a sheet of packing paper or bubble wrap on a flat surface and lay the mug in the center. Wrap the mug with the paper or bubble wrap, ensuring all sides are covered and secured with tape.
  3. Fill Empty Spaces: Once the mugs are individually wrapped, fill any empty spaces in the box with packing peanuts or crumpled packing paper to prevent shifting during transit. This will help cushion the mugs and provide additional protection against impact.
  4. Pack Mugs Vertically: When packing the mugs in the box, it’s best to pack them vertically rather than stacking them horizontally. This will help distribute the weight evenly and reduce the risk of breakage. Place the wrapped mugs upright in the box, arranging them snugly to maximize space utilization.
  5. Use Dividers or Cardboard Inserts: For added protection, consider using dividers or cardboard inserts to create separate compartments for each mug within the box. This will help prevent them from knocking into each other during transit and minimize the risk of breakage.
  6. Label the Box: Once the box is packed, seal it securely with packing tape and label it clearly as “Fragile” or “Handle with Care.” This will alert your movers to exercise caution when handling the box and ensure it’s placed in a safe location during transport.
  7. Consider Using Dish Barrels: If you have a large collection of mugs or particularly fragile pieces, consider investing in dish barrels or dish packs. These specialty boxes are designed specifically for transporting fragile dishware and provide extra protection with reinforced walls and dividers.

Conclusion:

Packing mugs for moving requires careful attention to detail to ensure they arrive at your new home safely. By following these expert tips from Cheap Movers Costa Mesa, you can pack your mugs with confidence and peace of mind, knowing they’re well-protected during transit. With proper cushioning, strategic packing, and clear labeling, you can minimize the risk of breakage and enjoy your favorite beverages in your new home.

GET A FREE QUOTE

How to Use Moving Blankets?

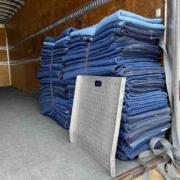
How to use moving blankets? Moving blankets are essential tools for protecting furniture, appliances, and fragile items during a move. When used correctly, these versatile blankets provide cushioning and prevent scratches, dents, and other damage. Cheap Movers Costa Mesa understands the importance of safeguarding your belongings during transit. In this informative guide, we share expert tips on how to use moving blankets effectively to ensure a smooth and damage-free move.

How to Use Moving Blankets

  1. Wrap Large Furniture Items: Begin by wrapping large furniture items, such as sofas, tables, and dressers, with moving blankets. Lay the blanket flat on the floor and carefully place the item on top of it. Fold the edges of the blanket over the item and secure them in place with tape or straps. Ensure that the entire surface of the furniture is covered to provide maximum protection.
  2. Pad Fragile Surfaces: Moving blankets are ideal for padding fragile surfaces, such as glass tabletops, mirrors, and artwork. Place a moving blanket over the surface and secure it with tape or stretch wrap. For added protection, consider layering multiple blankets or using specialized padding materials, such as foam or cardboard, before wrapping with a moving blanket.
  3. Secure Blankets with Straps or Rope: Once the items are wrapped in moving blankets, secure them tightly with straps or rope. This prevents the blankets from shifting or coming loose during transit. Use ratchet straps or heavy-duty rope to create tight, secure bundles, especially for large or heavy items.
  4. Protect Floors and Walls: Moving blankets can also be used to protect floors and walls from damage caused by furniture and appliances. Place blankets under heavy items to prevent scratches and dents on hardwood floors or tile surfaces. Similarly, use blankets to create a barrier between furniture and walls to avoid scuff marks or dings.
  5. Pad Sharp Edges and Corners: To prevent damage from sharp edges or corners, pad them with moving blankets before wrapping larger items. Fold a moving blanket to create multiple layers and place it over the sharp edge or corner. Secure the blanket in place with tape or stretch wrap to provide extra padding and protection.
  6. Create a Cushioning Layer: For delicate items or electronics, create a cushioning layer with moving blankets to absorb shocks and vibrations during transit. Place a layer of moving blankets at the bottom of boxes or containers before packing fragile items. This extra padding helps minimize the risk of breakage or damage during the move.
  7. Label and Organize: To streamline the unpacking process, label each bundle or item wrapped in moving blankets with its contents and destination room. Use labels or markers to indicate “Fragile” or “Handle with Care” for delicate items. Organize the wrapped items strategically in the moving truck to facilitate easy access and unpacking at your new home.

Conclusion:

Moving blankets are invaluable assets for protecting your belongings during a move. By following these expert tips from Cheap Movers Costa Mesa, you can use moving blankets effectively to safeguard furniture, appliances, and fragile items from damage during transit. With proper padding, securing, and organization, you can enjoy a smooth and stress-free move knowing that your possessions are well-protected every step of the way.

GET A FREE QUOTE

How to pack glass shelves for moving

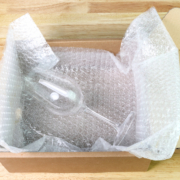
How to pack glass shelves for moving? Packing delicate items like glass shelves for a move requires extra care and attention to ensure they arrive at your new home intact. Glass shelves are susceptible to cracks, chips, and breakage during transit if not properly protected. With the right techniques and materials, you can pack glass shelves securely to minimize the risk of damage. In this expert guide, Cheap Movers Costa Mesa shares essential tips on how to pack glass shelves for moving safely, helping you safeguard your fragile belongings throughout the relocation process.

How to pack glass shelves for moving?

  1. Gather Packing Supplies: Before you begin packing, gather all the necessary packing supplies, including:
    • Strong cardboard boxes in appropriate sizes
    • Bubble wrap or packing paper
    • Packing tape
    • Corner protectors or foam padding
    • Marker for labeling boxes
  2. Clean and Prepare the Glass Shelves: Start by cleaning the glass shelves thoroughly to remove any dust, dirt, or residue. Allow them to dry completely before packing to prevent moisture buildup, which could lead to damage during transit. Inspect the shelves for any existing cracks or chips, and take note of them for extra caution.
  3. Protect the Corners: Use corner protectors or foam padding to reinforce the corners of the glass shelves, as they are particularly vulnerable to damage. Place a corner protector on each corner of the shelf and secure it with packing tape to provide cushioning and stability.
  4. Wrap Each Shelf Individually: Wrap each glass shelf individually with several layers of bubble wrap or packing paper to create a protective cushioning layer. Start from one end of the shelf and wrap it tightly, covering all exposed surfaces. Secure the wrapping with packing tape to hold it in place.
  5. Use Dividers or Inserts: If packing multiple glass shelves together in the same box, use dividers or inserts to create separate compartments and prevent them from coming into contact with each other. Place a layer of bubble wrap or foam padding between each shelf to provide additional cushioning.
  6. Choose the Right Box: Select a sturdy cardboard box that is slightly larger than the glass shelves to allow space for padding and protection. Avoid overpacking the box to prevent it from becoming too heavy or risking damage to the contents.
  7. Arrange Shelves Carefully: Carefully arrange the wrapped glass shelves inside the box, placing them upright or on their sides depending on their shape and size. Ensure there is enough padding between each shelf and along the sides of the box to prevent shifting during transit.
  8. Fill Empty Spaces: Fill any remaining empty spaces in the box with additional packing material, such as crumpled packing paper or foam peanuts, to provide extra cushioning and stability. The goal is to minimize movement and keep the shelves securely in place.
  9. Seal and Label the Box: Once the box is packed, securely seal it with packing tape along all seams to prevent it from opening during transit. Use a marker to label the box as “Fragile” and indicate which end is up to ensure proper handling.
  10. Handle with Care: When transporting the box containing the glass shelves, handle it with extreme care to avoid dropping or jostling it. Consider loading it separately in your vehicle and placing it in a secure location to prevent it from shifting during transit.

Conclusion:

Packing glass shelves for moving requires attention to detail and proper handling to ensure they reach their destination without damage. By following these expert tips from Cheap Movers Costa Mesa, you can pack glass shelves safely and securely, giving you peace of mind during your relocation. For professional moving assistance tailored to your needs, contact Cheap Movers Costa Mesa today.

Let us help you make your move a smooth and stress-free experience from start to finish.

GET A FREE QUOTE

How to Move a Gaming PC to a New Home

How to move a gaming PC to a new home? Moving a gaming PC to a new home requires careful handling to ensure that your valuable equipment arrives safely and in working condition. From packing delicate components to transporting them securely, there are several steps you can take to safeguard your gaming setup during the move. In this expert guide, Cheap Movers Costa Mesa provides essential tips and techniques to help you move your gaming PC with confidence and peace of mind.

  1. Back Up Your Data: Before dismantling your gaming PC, make sure to back up all important data, including game saves, settings, and files. Use an external hard drive, cloud storage service, or backup software to create a secure copy of your data to prevent loss or corruption during the move.
  2. Gather Packing Supplies: Gather all the necessary packing supplies to protect your gaming PC during transit. This includes anti-static bags for delicate components, bubble wrap or packing paper for cushioning, zip ties or cable management tools, and sturdy boxes or containers for transportation.
  3. Disassemble Your PC: Carefully disassemble your gaming PC into its individual components to make it easier to pack and transport. Start by unplugging all cables and peripherals, then remove the graphics card, CPU cooler, RAM, and any other removable components. Place screws and small parts in labeled bags to keep them organized.
  4. Pack Components Securely: Wrap each component separately in anti-static bags or bubble wrap to protect them from static electricity and impact damage. Use packing paper or foam padding to fill any empty spaces in the boxes and prevent components from shifting during transit.
  5. Label Boxes: Label each box or container with its contents and indicate which side is up to ensure proper handling during the move. Clearly mark boxes containing delicate components like the graphics card or CPU cooler to alert movers to handle them with extra care.
  6. Transport with Care: When transporting your gaming PC, take extra precautions to ensure its safety. Place boxes containing delicate components in a secure location within the moving vehicle, away from heavy or bulky items that could damage them. Avoid stacking boxes on top of each other to prevent crushing or shifting during transit.
  7. Reassemble at Your New Home: Upon arrival at your new home, carefully unpack and reassemble your gaming PC using the labeled boxes and bags. Take your time to reconnect cables, peripherals, and components, ensuring everything is properly seated and secured.
  8. Test Your Setup: Once your gaming PC is reassembled, test it thoroughly to ensure that all components are functioning correctly. Check for any loose connections, unusual noises, or error messages that may indicate damage or issues during the move.
  9. Update Drivers and Settings: After confirming that your gaming PC is in working order, take the time to update drivers, firmware, and settings to optimize performance and compatibility with your new environment. Install any necessary software updates and configure your gaming setup to your preferences.
  10. Enjoy Your Gaming Setup in Your New Home: With your gaming PC safely moved and set up in your new home, take the time to relax and enjoy your gaming setup in its new surroundings. Invite friends over for a gaming session or explore new virtual worlds from the comfort of your new space.

Conclusion:

Moving a gaming PC to a new home requires careful planning and attention to detail to ensure its safety and functionality. By following these expert tips from Cheap Movers Costa Mesa, you can move your gaming setup with confidence and peace of mind. Whether you’re a casual gamer or a hardcore enthusiast, prioritize the safety of your gaming PC during the move to protect your investment and continue enjoying immersive gaming experiences in your new home.

Contact Cheap Movers Costa Mesa for affordable and reliable moving services tailored to your needs, and make your gaming PC relocation a seamless experience.

GET A FREE QUOTE