How to Move a Bed Cross Country?

How to Move a Bed Cross Country?

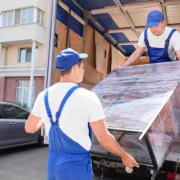
How to move a bed cross country? Moving a bed cross country requires careful planning and preparation to ensure that your bed arrives safely and intact at your new destination. In this comprehensive guide by Cheap Movers Costa Mesa, we’ll provide you with expert tips and strategies to help you navigate the process smoothly and efficiently.

How to Move a Bed Cross Country?

1. Disassemble the Bed Frame:

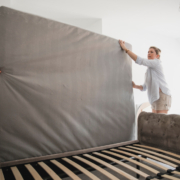
  • Start by disassembling the bed frame, including removing the headboard, footboard, side rails, and slats.
  • Keep all screws, bolts, and other hardware in a labeled bag or container to avoid losing them during the move.

2. Protect the Mattress and Box Spring:

  • Use mattress and box spring covers or heavy-duty plastic wrap to protect them from dust, dirt, and moisture during transit.
  • Consider investing in mattress bags specifically designed for moving to provide extra protection.

3. Wrap Fragile Components:

  • Wrap any fragile components, such as decorative finials or ornate headboards, with bubble wrap or moving blankets to prevent damage.
  • Secure the wrapping with packing tape to keep it in place during transport.

4. Use Furniture Blankets:

  • Wrap each disassembled part of the bed frame in furniture blankets or moving pads to protect them from scratches and dents.
  • Secure the blankets with packing tape or furniture straps to ensure they stay in place during transit.

5. Securely Pack Hardware:

  • Place all hardware, including screws, bolts, and nuts, in a plastic bag or container and label it clearly.
  • Tape the bag securely to one of the bed frame components or place it inside a labeled box for easy identification upon arrival.

6. Choose the Right Moving Vehicle:

  • Rent a moving truck or trailer that is large enough to accommodate the disassembled bed frame, mattress, and box spring.
  • Ensure that the vehicle is equipped with proper tie-downs or straps to secure the bed components during transit.

7. Load the Bed Components Safely:

  • Load the disassembled bed components into the moving vehicle carefully, placing heavier items on the bottom and lighter items on top.
  • Use moving straps or tie-downs to secure the bed components to the walls or floor of the vehicle to prevent shifting during transit.

8. Protect Against Damage:

  • Place additional padding or cushioning between bed components and other items in the moving vehicle to prevent damage from shifting during transit.
  • Avoid placing heavy items on top of the mattress or box spring to prevent them from being crushed or damaged.

9. Drive Safely and Securely:

  • Drive cautiously and adhere to all traffic laws and regulations to ensure the safety of yourself and your belongings during transit.
  • Check the load periodically during the journey to ensure that the bed components remain secure and undamaged.

10. Unload and Reassemble Carefully:

  • Upon arrival at your new destination, unload the bed components carefully and reassemble the bed frame according to the manufacturer’s instructions.
  • Take your time to ensure that all components are securely fastened and properly aligned before placing the mattress and box spring back on the frame.

Conclusion:

Moving a bed cross country can be a challenging task, but with the right preparation and precautions, you can ensure that your bed arrives safely and ready to use at your new home. By following these expert tips from Cheap Movers Costa Mesa, you can streamline the process and enjoy a smooth transition to your new living space.

GET A FREE QUOTE!

How to Move a Heavy Safe by Myself?

How to Move a Heavy Safe by Myself?

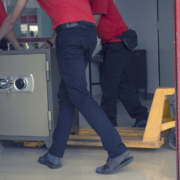
How to move a heavy safe by myself? Moving a heavy safe by yourself can be a daunting task, but with the right preparation and techniques, it’s possible to do so safely and efficiently. In this guide, Cheap Movers Costa Mesa shares expert tips to help you navigate the process of moving a heavy safe solo.

How to Move a Heavy Safe by Myself?

1. Assess the Weight and Dimensions:

  • Know Your Limits: Before attempting to move the safe, carefully assess its weight and dimensions. If it exceeds your physical capabilities, consider seeking professional assistance.
  • Measure Doorways and Pathways: Ensure the safe can fit through doorways and hallways along the intended route. Remove any obstacles or furniture that may obstruct the path.

2. Gather the Necessary Equipment:

  • Heavy-Duty Dolly: Invest in a heavy-duty dolly equipped with straps or a stair climber attachment to facilitate the safe’s movement.
  • Furniture Sliders: Use furniture sliders or moving blankets to protect floors and minimize friction when maneuvering the safe.

3. Enlist Assistance if Possible:

  • Seek Help: If possible, enlist the help of friends or family members to assist with the move. Having additional hands can make the process safer and more manageable.
  • Communicate Clearly: Establish clear communication and coordination among everyone involved in the move to ensure smooth and safe handling of the safe.

4. Use Proper Lifting Techniques:

  • Lift with Your Legs: When lifting the safe, bend at the knees and use your leg muscles rather than your back to avoid strain or injury.
  • Maintain a Straight Back: Keep your back straight and avoid twisting or jerking motions while lifting or carrying the safe.

5. Secure the Safe for Transport:

  • Use Straps or Ropes: Secure the safe to the dolly or hand truck using heavy-duty straps or ropes to prevent it from shifting or falling during transport.
  • Stabilize the Load: Position the safe securely on the dolly and ensure it is balanced to prevent tipping or tilting.

6. Take Breaks and Stay Hydrated:

  • Listen to Your Body: Moving a heavy safe is physically demanding work. Take regular breaks to rest and hydrate, especially in hot weather.
  • Avoid Overexertion: Pace yourself and avoid pushing beyond your physical limits to prevent fatigue or injury.

7. Plan Your Route Carefully:

  • Choose the Best Path: Select the smoothest and most obstacle-free route for transporting the safe, avoiding stairs or uneven terrain whenever possible.
  • Use Caution on Stairs: If navigating stairs is unavoidable, proceed slowly and carefully, using the dolly’s stair climber attachment if available.

Conclusion:

Moving a heavy safe by yourself requires careful planning, proper equipment, and adherence to safety guidelines. By following these expert tips from Cheap Movers Costa Mesa, you can successfully move your safe solo while minimizing the risk of injury or damage. Remember to prioritize safety at all times and consider seeking professional assistance if needed.

GET A FREE QUOTE!

Which are the Golden Rules of Packing for a Move?

Which are the Golden Rules of Packing for a Move?

Which are the golden rules of packing for a move? Packing for a move can be a daunting task, but with the right approach, you can streamline the process and ensure your belongings arrive safely at your new destination. At Cheap Movers Costa Mesa, we’ve mastered the art of packing, and we’re here to share our golden rules to make your packing experience efficient and stress-free.

1. Start Early and Plan Ahead:

  • Begin Well in Advance: Don’t leave packing until the last minute. Start packing non-essential items weeks before your move to avoid rushing and reduce stress as moving day approaches.
  • Create a Packing Plan: Make a detailed plan outlining which rooms or areas you’ll pack first and how you’ll tackle larger items. Having a strategy in place will keep you organized and on track throughout the packing process.

2. Declutter and Downsize:

  • Sort Through Your Belongings: Before you start packing, take the time to declutter and downsize your possessions. Donate, sell, or discard items you no longer need or use to lighten your load and reduce the number of items you’ll need to pack and move.
  • Minimize Packing Costs: Moving fewer items means lower packing and transportation costs, so be selective about what you pack and take with you to your new home.

3. Use Quality Packing Supplies:

  • Invest in Sturdy Boxes: Purchase or acquire sturdy moving boxes in various sizes to accommodate different items. Reinforce boxes with packing tape to prevent them from collapsing during transit.
  • Protective Packing Materials: Use bubble wrap, packing paper, foam peanuts, or old newspapers to cushion fragile items and prevent breakage during handling and transportation.

4. Pack Strategically and Efficiently:

  • Pack Room by Room: Pack one room at a time to maintain organization and prevent items from getting mixed up. Label each box with its contents and destination room to make unpacking easier.
  • Pack Heavier Items First: Place heavier items at the bottom of boxes and lighter items on top to distribute weight evenly and prevent damage to fragile belongings.

5. Take Care of Special Items:

  • Wrap Valuables Securely: Wrap valuable or sentimental items, such as jewelry, artwork, or electronics, in protective padding and place them in clearly labeled boxes. Consider transporting these items yourself for added peace of mind.
  • Handle Hazardous Materials Safely: Dispose of or properly pack hazardous materials, such as cleaning supplies, paints, or batteries, according to local regulations to ensure safe transport.

Conclusion:

With these golden rules of packing from Cheap Movers Costa Mesa, you can approach your move with confidence and efficiency. By starting early, decluttering, using quality packing supplies, packing strategically, and taking care of special items, you’ll streamline the packing process and set yourself up for a successful and stress-free move.

GET A FREE QUOTE

How to Prepare for Moving Day?

How to prepare for moving day? Moving day can be both exciting and overwhelming, but with proper preparation, you can ensure a smooth and stress-free experience. At Cheap Movers Costa Mesa, we understand the importance of being well-prepared for moving day, which is why we’ve compiled this comprehensive guide to help you get ready for the big day.

How to prepare for moving day?

1. Create a Moving Checklist:

  • Start by creating a detailed moving checklist that outlines all the tasks you need to complete before moving day. Include everything from packing belongings to notifying utilities companies and changing your address.

2. Gather Packing Supplies:

  • Stock up on essential packing supplies such as moving boxes, packing tape, bubble wrap, packing paper, and markers. Having all the necessary materials on hand will streamline the packing process and prevent last-minute trips to the store.

3. Pack Strategically:

  • Begin packing non-essential items well in advance of moving day. Start with items you use infrequently and work your way towards everyday essentials. Label each box with its contents and the room it belongs to for easy unpacking at your new home.

4. Arrange for Utilities Transfer:

  • Contact your utility providers to schedule the transfer or disconnection of services at your current address and the activation of utilities at your new home. Ensure that electricity, water, gas, internet, and other essential services are set up before moving day.

5. Confirm Moving Details:

  • Double-check the details of your moving arrangements with your chosen moving company, including the date, time, and any special requirements. Confirm parking arrangements and any access restrictions at both your current and new residence.

6. Prepare Your Furniture and Appliances:

  • Disassemble large furniture pieces and disconnect appliances like refrigerators, washing machines, and dishwashers if necessary. Pack screws, bolts, and other hardware in labeled bags and keep them together with their respective items.

7. Pack an Essentials Box:

  • Pack a separate box containing essential items you’ll need on moving day and during the first few days in your new home. Include toiletries, medications, a change of clothes, important documents, snacks, and basic cleaning supplies.

8. Organize Important Documents:

  • Gather important documents such as identification, passports, insurance policies, medical records, and financial documents, and keep them in a secure and easily accessible place. Consider carrying these documents with you rather than packing them with your other belongings.

9. Make Arrangements for Pets and Children:

  • Arrange for pets to be cared for on moving day, whether it’s hiring a pet sitter, boarding them, or confining them to a separate room. If you have children, ensure they are supervised and entertained to minimize disruptions during the move.

10. Stay Flexible and Stay Calm:

  • Despite careful planning, unexpected challenges may arise on moving day. Stay flexible and adaptable, and don’t be afraid to ask for help if needed. Remember to stay calm and focus on the excitement of starting a new chapter in your new home.

Conclusion:

By following these steps from Cheap Movers Costa Mesa, you can effectively prepare for moving day and ensure a smooth and successful transition to your new home. With proper planning and organization, you’ll be ready to tackle any challenges that come your way and enjoy a stress-free moving experience.

GET A FREE QUOTE

10 Proper lifting techniques for moving heavy furniture and boxes

Moving heavy furniture and boxes: Moving heavy furniture and boxes can be physically demanding and potentially hazardous if not done correctly. At Cheap Movers Costa Mesa, we prioritize safety above all else. In this guide, we’ll outline 10 proper lifting techniques to help you move heavy items safely and prevent injuries.

Moving Heavy Furniture and boxes

1. Size Up the Load: Before lifting any heavy item, assess its size, weight, and shape. Determine if you can safely lift it alone or if you need assistance from a friend or professional mover.

2. Warm Up Your Muscles: Perform some light stretching and warm-up exercises to prepare your muscles for the physical activity ahead. This can help reduce the risk of strains or muscle injuries.

3. Maintain Proper Posture: Stand with your feet shoulder-width apart and keep your back straight. Bend your knees and hips to lower yourself into a squatting position, rather than bending at the waist.

4. Get a Firm Grip: Ensure you have a secure grip on the item you’re lifting. Use your palms and fingers to grasp the object firmly, and avoid gripping with just your fingertips, which can lead to dropping the item.

5. Lift with Your Legs: Use the muscles in your legs to power the lift, rather than relying solely on your back. Push through your heels as you straighten your legs to lift the item off the ground.

6. Keep the Load Close: Hold the item close to your body as you lift it, rather than extending your arms outward. This helps distribute the weight more evenly and reduces strain on your back.

7. Use Smooth Movements: Avoid jerking or sudden movements when lifting heavy items. Lift smoothly and steadily, using controlled motions to minimize the risk of injury.

8. Pivot with Your Feet: If you need to change direction while carrying a heavy item, pivot with your feet rather than twisting your upper body. This helps protect your spine from unnecessary strain.

9. Take Breaks When Needed: Listen to your body and take regular breaks to rest and hydrate, especially during prolonged lifting sessions. Overexertion can increase the risk of injury, so pace yourself accordingly.

10. Use Tools and Equipment: Whenever possible, use tools such as dollies, hand trucks, or lifting straps to assist with moving heavy items. These tools can make the job easier and reduce the strain on your body.

Conclusion:

By following these 10 proper lifting techniques from Cheap Movers Costa Mesa, you can safely move heavy furniture and boxes without risking injury to yourself or others. Remember to prioritize safety at all times and don’t hesitate to seek assistance when needed.

GET A FREE QUOTE

How to Pack Lamps for Moving?

How to pack lamps for moving? Moving can be a daunting task, especially when it comes to packing fragile items like lamps. Properly packing your lamps ensures they arrive at your new home safely, without any damage. In this guide, Cheap Movers Costa Mesa provides valuable tips on how to pack lamps for moving, ensuring a smooth and stress-free relocation process.

How to Pack Lamps for Moving?

1. Gather Packing Supplies: Before you start packing, gather the necessary supplies, including sturdy moving boxes in various sizes, packing paper, bubble wrap, packing tape, and a marker for labeling.

2. Disassemble the Lamp: Carefully disassemble the lamp by removing the lampshade, light bulb, and harp (the metal frame that supports the lampshade). Wrap each component individually to prevent them from scratching or breaking during transit.

3. Wrap the Base: Wrap the base of the lamp with several layers of packing paper or bubble wrap, securing it with packing tape. Pay extra attention to any delicate or protruding parts.

4. Protect the Lampshade: If your lampshade is made of fabric, gently dust it off and place it in a separate box lined with packing paper. For delicate or fragile lampshades, consider using a lampshade box or wrapping them in bubble wrap for added protection.

5. Secure the Harp: Wrap the harp in packing paper or bubble wrap to prevent it from bending or getting damaged. Place it inside the box alongside the lamp base, ensuring it is well cushioned with packing material.

6. Pack Carefully: Place the wrapped lamp base and harp inside a sturdy moving box, making sure they fit snugly to prevent shifting during transit. Fill any empty spaces with crumpled packing paper or bubble wrap to provide additional cushioning.

7. Label the Box: Clearly label the box containing the lamp parts as “Fragile” and “Lamps” to alert movers to handle it with care. Indicate which end should be kept upright to avoid mishandling.

8. Pack the Light Bulb Separately: Wrap the light bulb in packing paper or bubble wrap and pack it in a small box labeled “Light Bulbs.” Keep this box separate from the lamp components to prevent damage.

9. Seal and Secure: Once the box is packed, seal it with packing tape and reinforce the bottom with extra tape for added security. Mark the box with your name, destination address, and any other relevant information.

Conclusion:

By following these tips from Cheap Movers Costa Mesa, you can pack your lamps for moving efficiently and safely. Taking the time to properly protect your lamps ensures they arrive at your new home intact, ready to illuminate your space once again. With the right packing techniques and supplies, you can tackle the challenge of moving lamps with confidence and ease.

GET A FREE QUOTE

How to Pack a Vacuum Cleaner for Moving?
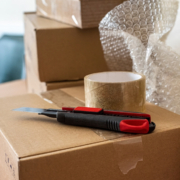
How to pack a vacuum cleaner for moving? Packing a vacuum cleaner for moving requires careful attention to ensure it arrives at your new home safely and ready to use. With the right approach and guidance from Cheap Movers Riverside, you can protect your vacuum cleaner from damage during transit. Follow these expert tips to pack your vacuum cleaner effectively for your upcoming move.

How to Pack a Vacuum Cleaner for Moving?

1. Clean the Vacuum Cleaner: Before packing, thoroughly clean your vacuum cleaner to remove any dirt, debris, or dust that may have accumulated. Empty the dustbin or bag, remove any attachments, and wipe down the exterior with a damp cloth. Allow the vacuum cleaner to dry completely before proceeding.

2. Disassemble Attachments: If your vacuum cleaner has detachable components such as hoses, brushes, or attachments, remove them before packing. Wrap each attachment separately in bubble wrap or packing paper to prevent them from scratching or damaging other items during transit.

3. Secure the Power Cord: Carefully wind the power cord around the vacuum cleaner’s body or cord hooks, if available. Use twist ties or rubber bands to secure the cord in place and prevent it from tangling during transit. Avoid wrapping the cord too tightly to avoid damage.

4. Protect the Vacuum Cleaner: Wrap the entire vacuum cleaner in several layers of bubble wrap or moving blankets to provide cushioning and protection during transit. Secure the wrapping with packing tape to keep it in place. Pay special attention to fragile parts, such as the handle or canister, to prevent damage.

5. Choose the Right Box: Select a sturdy cardboard box that is large enough to accommodate the vacuum cleaner and provide additional padding on all sides. Place crumpled packing paper or foam peanuts at the bottom of the box to create a cushioning layer.

6. Pack the Vacuum Cleaner: Carefully place the wrapped vacuum cleaner inside the box, ensuring it is positioned upright and does not shift or move around. Fill any empty spaces in the box with additional packing material, such as packing paper or foam peanuts, to prevent the vacuum cleaner from shifting during transit.

7. Seal and Label the Box: Once the vacuum cleaner is securely packed inside the box, seal the box with packing tape to keep it closed. Clearly label the box with “Fragile” and “This Side Up” indicators to alert movers to handle it with care. Also, mark the box with its contents and the room it belongs to for easy identification during unpacking.

8. Consider Professional Moving Services: If you’re unsure about how to pack your vacuum cleaner or prefer to leave the packing to the professionals, consider hiring packing services from Cheap Movers Riverside. Experienced movers can safely and efficiently pack your vacuum cleaner and other belongings, ensuring they arrive at your new home intact.

Conclusion:

Packing a vacuum cleaner for moving requires careful preparation and attention to detail. By following these expert tips from Cheap Movers Riverside, you can ensure your vacuum cleaner is packed securely and arrives at your new home ready to help you keep your space clean and tidy.

GET A FREE QUOTE

How to Pack Knives For Moving?

How to pack knives for moving? Packing knives for a move requires careful attention to ensure both safety and protection. In this guide, Cheap Movers Costa Mesa shares expert tips on how to pack knives effectively to prevent accidents and damage during transit.

How to Pack Knives for Moving?

1. Gather Necessary Supplies: Before you start packing, gather the necessary supplies including sturdy cardboard boxes, packing paper, bubble wrap, packing tape, and markers for labeling.

2. Wrap Each Knife Individually: Wrap each knife individually in packing paper to provide cushioning and protection. Ensure that the blade is completely covered to prevent any accidents while handling.

3. Use Bubble Wrap for Extra Protection: For fragile or sharp knives, consider wrapping them in an additional layer of bubble wrap to provide extra cushioning against impacts.

4. Secure with Packing Tape: Once wrapped, secure the packing paper and bubble wrap with packing tape to keep everything in place. Make sure to tape the ends securely to prevent unwrapping during transit.

5. Pack in a Sturdy Box: Choose a sturdy cardboard box that is appropriately sized for your knives. Place the wrapped knives inside the box vertically to prevent them from shifting during transit.

6. Fill Empty Spaces: Fill any empty spaces in the box with packing paper or bubble wrap to prevent the knives from moving around. This will help cushion them and minimize the risk of damage.

7. Label the Box Clearly: Label the box as “Sharp Items” or “Kitchen Knives” to alert movers and yourself to its contents. Use clear and visible labels to ensure safe handling.

8. Keep the Box Separate: Keep the box containing the knives separate from other household items during the move. This will prevent accidental injuries and make it easier to unpack and store them safely upon arrival.

9. Inform Movers: Inform your movers about the box containing sharp items so they can handle it with extra care. Provide clear instructions on its placement in the moving truck to avoid any accidents.

10. Unpack with Caution: Upon arrival at your new home, unpack the box containing the knives with caution. Carefully remove each knife from the box and store them in a safe and secure location away from children and pets.

Conclusion:

With these expert tips from Cheap Movers Costa Mesa, you can pack your knives safely and securely for a stress-free move. By taking the necessary precautions, you can ensure that your knives arrive at your new home intact and ready for use.

GET A FREE QUOTE

What to do With Your Food When Moving?

What to do with your food when moving? Moving to a new home can be an exciting adventure, but it also comes with its fair share of challenges, especially when it comes to handling perishable food items. As a trusted moving company serving Costa Mesa, we understand the importance of properly managing food during the relocation process. In this guide, we’ll explore practical tips and solutions for what to do with your food when moving to ensure a smooth transition to your new home.

What to do With Your Food When Moving?

1. Plan Ahead: Before moving day arrives, take stock of the food items in your pantry, refrigerator, and freezer. Create a plan to use up perishable items and minimize food waste in the weeks leading up to your move. Consider meal planning and using up items that are close to expiration.

2. Use Up Perishables: In the days leading up to your move, focus on consuming perishable food items such as fresh produce, dairy products, and meats. Get creative with meal ideas to use up these items and avoid having to discard them before the move.

3. Donate Unopened Non-Perishables: If you have unopened non-perishable food items that you don’t plan to use before the move, consider donating them to a local food bank or charity. Many organizations welcome donations of canned goods, pasta, rice, and other shelf-stable items to help those in need.

4. Pack Non-Perishables for the Move: For non-perishable food items that you want to take with you to your new home, pack them securely in sealed boxes or containers. Label the boxes clearly with their contents and ensure they are packed securely to prevent spills or damage during transit.

5. Dispose of Perishables Safely: As moving day approaches, it’s essential to dispose of any remaining perishable food items safely. Avoid packing perishables for the move, as they may spoil during transit and pose a risk of contamination. Instead, consider giving them away to friends or neighbors, composting them if possible, or disposing of them in the trash.

6. Plan for Meals After the Move: Once you’ve arrived at your new home, plan ahead for meals to avoid the need for immediate grocery shopping. Consider packing a cooler with essential items for the first day or two, such as snacks, beverages, and easy-to-prepare meals.

7. Clean and Defrost Appliances: Before moving your refrigerator and freezer, be sure to clean them out thoroughly and defrost them if necessary. Dispose of any remaining perishable items, and wipe down the interior with a mild cleaning solution to prevent odors and bacteria growth during transit.

Conclusion:

Handling food when moving requires careful planning and organization to minimize waste and ensure food safety. By following these practical tips, you can effectively manage your food inventory and enjoy a smooth transition to your new home in Costa Mesa. Trust Cheap Movers Costa Mesa to handle the logistics of your move with professionalism and efficiency while you focus on settling into your new space.

GET A FREE QUOTE

7 Things to do on The First Day in a New Home

7 things to do on the first day in a new home: The first day in a new home is an exciting time filled with anticipation and new beginnings. To ensure a smooth transition and start off on the right foot, it’s important to tackle certain tasks right away. In this guide, we’ll explore seven essential things to do on your first day in a new home with Cheap Movers Costa Mesa.

7 things to do on the First Day in a New Home

1. Inspect the Property: Take some time to thoroughly inspect your new home, checking for any damage or issues that may have arisen during the move. Look for leaks, cracks, or other signs of damage that may need immediate attention.

2. Unpack Essential Items: Start by unpacking the essentials you’ll need for the first few days, such as bedding, toiletries, and kitchen essentials. Focus on setting up the basics to make your new home feel comfortable and functional right from the start.

3. Set Up Utilities and Services: If you haven’t already done so, contact utility companies to set up electricity, water, gas, internet, and other essential services. Ensure that everything is connected and functioning properly to avoid any inconvenience later on.

4. Familiarize Yourself with the Neighborhood: Take a stroll around your new neighborhood to get acquainted with your surroundings. Locate nearby amenities such as grocery stores, restaurants, parks, and public transportation options.

5. Update Your Address and Contact Information: Update your address and contact information with relevant parties, including banks, credit card companies, insurance providers, and government agencies. This will ensure that important mail and notifications are sent to the correct address.

6. Meet Your Neighbors: Introduce yourself to your new neighbors and take the opportunity to start building connections within the community. A friendly gesture can go a long way in fostering good relationships and creating a sense of belonging.

7. Plan Your Future Projects: Take some time to envision how you’d like to personalize and improve your new home. Whether it’s painting the walls, landscaping the yard, or embarking on a renovation project, start brainstorming ideas and creating a plan for future projects.

Conclusion:

The first day in a new home sets the tone for your experience in your new space. By tackling these seven essential tasks with Cheap Movers Costa Mesa, you can ensure a smooth transition and lay the groundwork for a happy and fulfilling life in your new home.

GET A FREE QUOTE